
Spectroscopy involves splitting light into its different wavelengths. Each chemical element emits or absorbs a unique spectrum of light. It is a bit like a barcode or a fingerprint. This makes spectroscopy a useful tool for measuring the chemical composition of objects in space.
In this activity, you will make and use a spectroscope. This is a tool used by astronomers to do spectroscopy. Light from a source enters the spectroscope and is broken up into its different wavelengths. The spectroscope you will be making in this activity uses a diffraction grating to break up the light. This is a thin piece of plastic film that contains thousands of tiny slits or gratings. These gaps in the material are too small to be seen by the human eye.
When you look into the spectroscope you will see different colours. This is the result of different wavelengths of light scattering at different angles as they pass through the grating paper. Different wavelengths correspond to different colours of light. This will give you a background which looks like a rainbow. On top of this rainbow, you might see dark lines, where there is a lack of light, or strong coloured lines, where there is a lot of light. These are due to the abundance of chemical elements between you can the light source.
By the end of this activity you will:
- have made your own spectroscope
- have used your knowledge about how light behaves
- understand more about how spectroscopy can be used in astronomy
To complete this activity you will need:
- printed spectroscope cut-out (printed card works much better than paper)
- diffraction grating paper (this can be purchased from online retailers)
- a light source to look at (e.g., a lamp or a torch)
- scissors
- ruler
- sticky tape
Have a go!
First, make sure you have all the things you need to complete this activity from the list above. Then, read through the safety advice below.
Once you have done that, you are ready to follow the instructions and make your own spectroscope (there is a printable version of the instructions you can download and print if you prefer).
Safety advice
- Remember, never look directly at the Sun
- Take care when using the scissors to score through the paper or card
Instructions
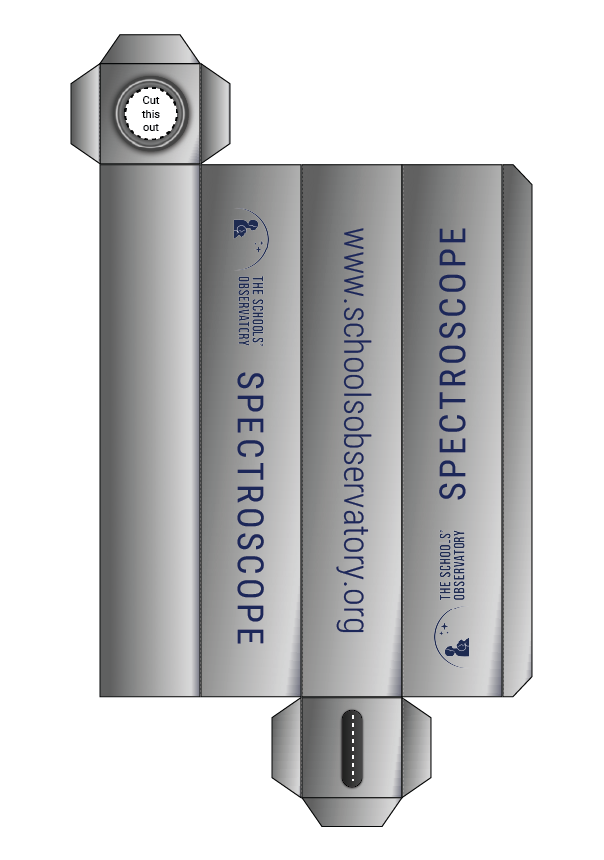
- Print off the spectroscope cut-out (make sure to print on one double-sided sheet or carefully stick the 2 pages back-to-back using glue).
- Cut out the spectroscope around the edges of the large shape.
- Score down the short, dashed line on the bottom flap using scissors. This is the slit you will look through, so make sure your scissors break through the paper or card.
- Cut out the small circle at the top. This hole will let light into your scope.
- Cut out 2 squares of diffraction grating a similar size to the hole you cut out in step 4.
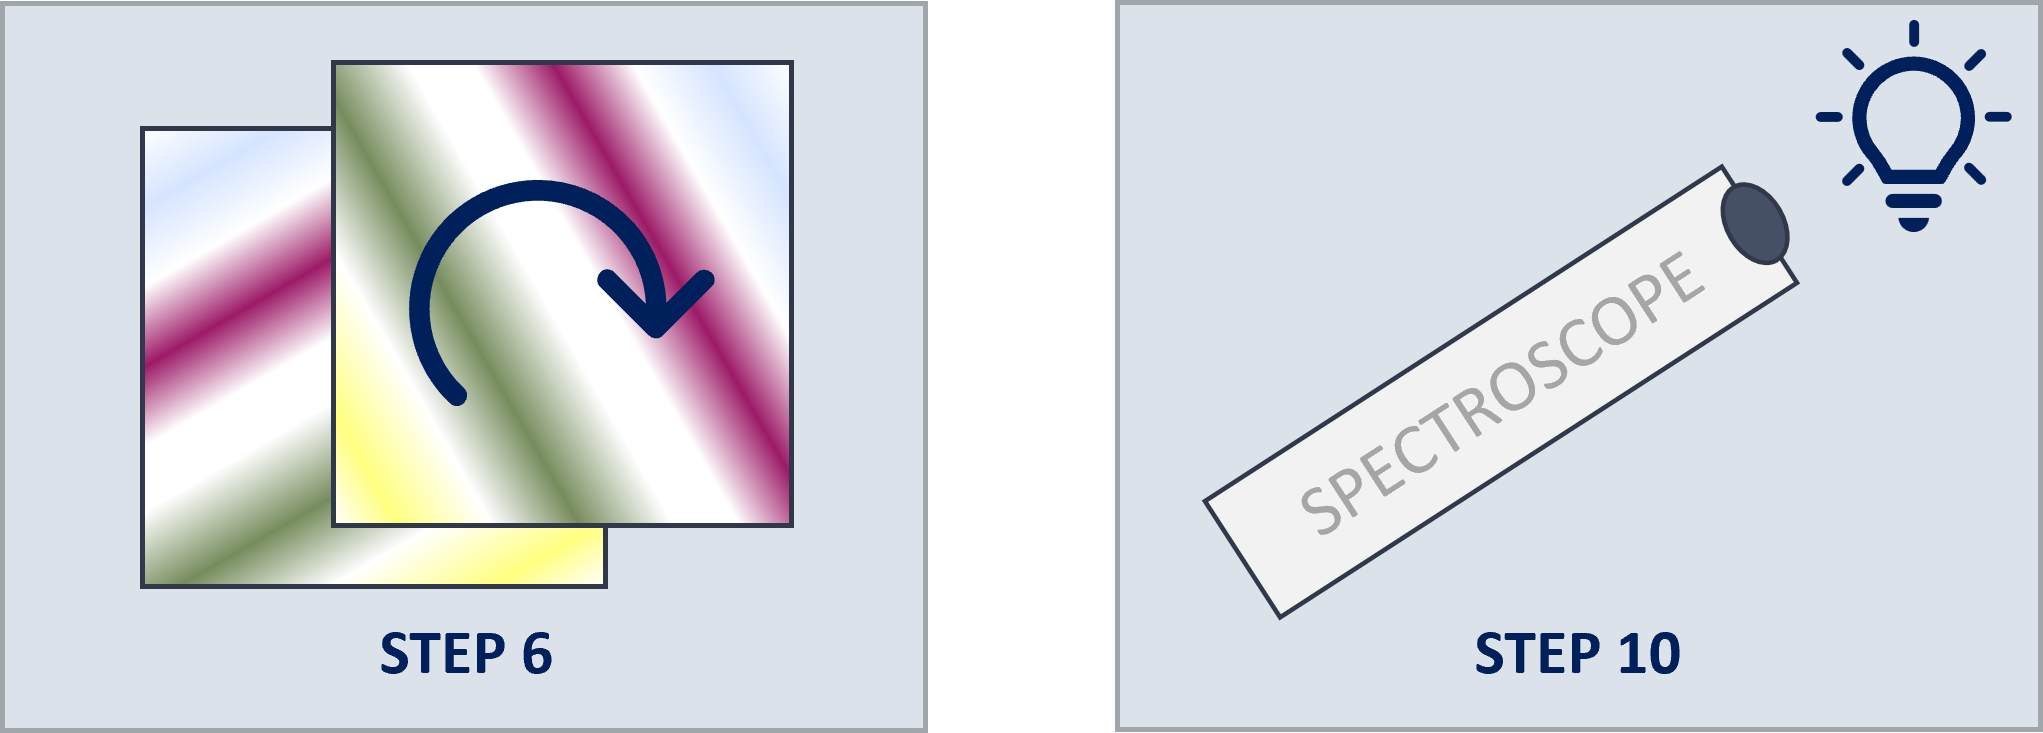
- Rotate one of the pieces by 90 degrees and lie it on top of the other.
- Carefully tape the gratings across the circular hole. It doesn’t matter which side of the hole but make sure you don’t bend the grating and ensure the tape doesn’t cover the hole.
- Carefully fold along the dotted lines on the spectroscope to create a long box. Make sure the writing ends up on the outside of the box.
- Stick the two flaps at the end down to seal the box. Again, be careful not to bend or cover the diffraction grating.
- Point the hole at different light sources and look through the slit.
You should be able to see a spectrum of light inside your spectroscope. It may remind you of a rainbow!
What’s going on?
Now that you can see your spectrum, you should be able to see a range of colours which correspond to different wavelengths. The background light from the Sun will show you a rainbow, and on top of this you may see strong coloured lines at particular wavelengths. These are emission lines - wavelengths of light that have been emitted by the light source, such as the lamp or bulb. These lines correspond to the chemical elements inside that light source that have emitted the photons.
You should also be able to see parts darker than the rest. These dark sections are not a trick of the light. They are absorption lines. These lines tell you about the composition of the material between you and the light source. The specific chemicals which lie between us and our light source have absorbed certain photons. This might be the glass surrounding a bulb, or a window you are looking through. The atoms that make up this chemical then release the absorbed photon in a random direction, resulting in fewer of these photons reaching your eye.